Hey there! If you thought creating dreamy light glows in Photoshop was hard, get ready for a pleasant surprise. I’m Roshan Kumar, and today I’ll be your guide to Oniric Glow Generator v2.3.0 – the latest and greatest version of the beloved Photoshop glow plugin. This update isn’t just a minor tweak; it’s a major glow upgrade that brings a suite of new features and improvements. The best part? While Oniric v2.3.0 originally goes for about $79 officially, you can grab this premium tool through our site for just $5.99 – that’s a steal for what you’re getting! No catch – just an amazing creative tool at a student-friendly price. By the end of this post, you’ll know exactly what’s new in Oniric 2.3.0, how it stacks up against the old v1.2.0, and how to install and start using it step-by-step. Let’s dive in (and get glowing)!
What is Oniric Glow Generator v2.3.0?

In case you’re new to Oniric, here’s a quick recap: Oniric is an intuitive, non-destructive glow plugin for Adobe Photoshop that makes it effortless to add ultra-realistic “bloom” and “glare” effects to your images. Think of those gorgeous halos around street lights in a rainy night photo, or the ethereal light flares in sci-fi movie posters – Oniric can create those in a few clicks. It uses real physics under the hood (inverse-square law for light falloff) to mimic how light actually behaves, so the glows fade out naturally and look photorealistic, not cheesy or pasted-on. The name “Oniric” comes from oneiric, meaning dreamlike – and true to its name, this plugin gives your images a dreamy, cinematic glow. Oniric was created by Composite Nation (led by digital artist Mario Olvera) specifically to make adding lighting effects in Photoshop easier and more accurate than using manual methods.

What’s special about v2.3.0? Oniric v2.3.0 is the latest UXP-based version (Adobe’s newer plugin format) built for Photoshop CC 2018 and above (though it really shines in Photoshop 2022+). This version introduces powerful new features that take your lighting effects to the next level. We’re talking filmic tone mapping, volumetric light rays, 32-bit HDR glow processing, revamped Chromatic Aberration controls, a dedicated Glare panel, and much more – all while running faster and smoother than ever. It’s a big leap forward, so let’s break down all the goodies in this update!
New Features in Oniric v2.3.0 – The Glow Game-Changer
Oniric v2.3.0 packs a ton of upgrades and new tools. Here’s a detailed look at what’s new and why it’s awesome:

⚡ Speed & Performance Boost
One of the first things you’ll notice is how snappy Oniric 2.3.0 feels. The developers have drastically improved render speeds for saving glow layers and for real-time previews. In practical terms, generating or updating a glow is faster with this version, making your workflow smoother. Adjusting sliders (like Threshold or Intensity) now updates the preview live without lag.
Even the Chromatic Aberration effect refreshes in real-time as you tweak it. If you’re using a newer computer, especially one of Apple’s M1/M2/M3 Macs, you’ll really appreciate this speed boost – Oniric is optimized to take advantage of those chips for ultra-fluid performance. No more waiting around; you can see your creative lighting edits almost instantly as you make them.
🏞️ Tone Mapping for HDR Highlights
Say hello to Tone Mapping, a brand-new feature in v2.3.0 that lives in the bottom section of the Oniric panel. This is a game-changer for handling images with a lot of dynamic range or bright highlights. The tone mapping tool uses an advanced exponential algorithm (the kind used in high-end photography) to compress highlights and lift shadows, much like a camera’s filmic response curve.
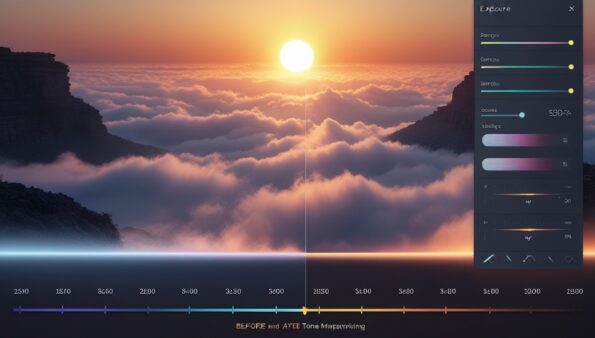
In plain English: it keeps your brightest areas from blowing out pure white and preserves detail, while also preventing banding in gradients. The result is that your glows look incredibly smooth and natural, even in very bright or HDR scenes. If you’ve ever had an image where adding glow made bright spots lose detail, tone mapping fixes that by balancing the exposure and gamma. Combined with the next feature (32-bit support), this gives you much richer, more cinematic glows.

🌈 32-Bit HDR Glow Processing
Oniric has always supported 32-bit images, but v2.3.0 takes it further by letting you enable 32-bit processing internally with a simple switch – even if your Photoshop document isn’t 32-bit. Why does this matter? In 32-bit mode, Oniric can produce glows with a far greater dynamic range and color depth. You get richer glow colors, smoother falloff, and more intense light blooms without ugly clipping or banding, especially useful for graphics or super-bright elements.
In older versions, you had to convert your file to 32-bit to get the full benefit; now it’s just a toggle inside the plugin. This means whether you’re working on HDR photography, 3D renders, or just want the highest quality glow, Oniric 2.3.0 has you covered. Turn on that 32-bit switch and watch even small light sources bloom beautifully in a way that simply wasn’t possible before. It’s like giving your glow a turbocharge in quality.
📸 Oniric Rays: Volumetric Light Beams
Ever wanted to add those dramatic “god rays” or sci-fi beam effects to your art? Oniric 2.3.0 introduces Oniric Rays, a completely new light effect that emits volumetric beams from a center point. This is perfect for creating magical atmospheres, sun rays piercing through trees, headlight beams in fog, or laser-like sci-fi vibes. You can customize the rays’ appearance – for instance, adjust their length, intensity, and angle – to fit your scene.
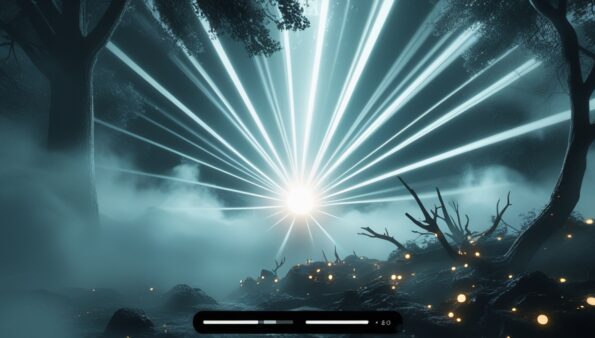
It’s like having a mini volumetric light machine inside Photoshop. Previously, Oniric focused on glows and glares around bright spots; now with Rays, it actually projects light beams outward, adding depth and drama to your lighting. It’s an incredibly fun feature to play with – a little sprinkle of cinematic flair that can make a flat image look epic. (Don’t worry, you still have full control, so it doesn’t overpower your image unless you want it to.)

✨ Glare Panel & New Glare Options
Glare effects (those streaky lens flares you get from bright lights, like anamorphic flares on car headlights) have been a core part of Oniric since v1.2.0. In v2.3.0, the Glare controls have been moved to their own dedicated panel. At the top of the Oniric interface, you’ll now see a “Glare” panel button – click that, and you get all the glare options separate from the main glow settings.
This not only tidies up the UI but also allows the developers to add new tweaks: for example, there’s a Glare Sharpness slider now. You can use this to make the glare streaks sharper and more defined, which is great if you want a crisp sci-fi lens flare look. The new panel makes it easier to experiment with glare without mixing those settings with the bloom/glow settings. If you loved adding star-like flares on specular highlights before, you’ll love the extra control and clarity in v2.3.0.
🌐 Chromatic Aberration Enhancements
Oniric’s Chromatic Aberration (formerly called “Light Dispersion”) has gotten a serious upgrade in this version. First, any changes you make to Chromatic Aberration now update in real-time, just like the main glow, so you can see the color fringing effect live as you adjust it. They also added an Intensity slider specifically for Chromatic Aberration, allowing you to dial up vibrant rainbow fringes or keep it subtle, independent of the blur amount.
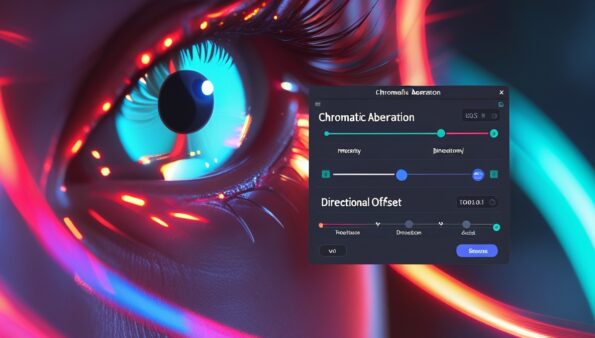
Perhaps coolest of all, there’s a new Directional Offset option: when you choose the “Offset” mode, you can now control the direction of the color channel separation. This means you’re not stuck with a uniform radial fringe; you can make the red/green/blue shift happen in a particular direction for a more realistic or creative look. These enhancements give your glows a touch of optical realism – that little red/blue tint at the edges, like real lenses sometimes create – and you have fine control over how pronounced it is.

🔧 Real-Time XRay Preview & Config Panel
Here’s a very nifty addition for power users: Oniric 2.3.0 comes with a Configuration Panel that lets you toggle real-time preview features and other settings. For example, the XRay mode (which is Oniric’s internal view of what areas are glowing) got an upgrade – now, if XRay is on, any change you make to the Threshold or Dynamic Range Compression sliders will update the XRay preview in real time, so you can literally watch the glow map adjust as you slide. In the config panel, you can turn these live previews on or off. If you have a beefy system and want everything updated live, go for it; if you prefer to tweak settings, then hit a button to update (to avoid any slowdowns), you can turn off real-time updates.
This flexibility is great because it caters to both preferences. The config panel also has options for UI customization and even language selection (yes, Oniric 2.3 adds multi-language support – English, Spanish, Japanese, Czech, and more are now supported right in the interface for non-English users!). It’s clear the developers focused on user experience: tooltips pop up when you hover over settings (handy for beginners), and you can even right-click any slider to reset it to the default. All these little touches make Oniric feel more polished and user-friendly than ever.
🎨 Mask Builder Outlines & Aspect Ratio Control
In v2.3.0, the section formerly called “Channels” is renamed to Mask Builder, and it’s gotten smarter. There’s a new “Outlines” button that automatically creates an outline mask based on your layer’s content. This is super useful if you want to generate a glow just around the edges of an object or text – essentially, you can create a mask from the layer’s pixels with one click, and use that to constrain your glow or apply it selectively.
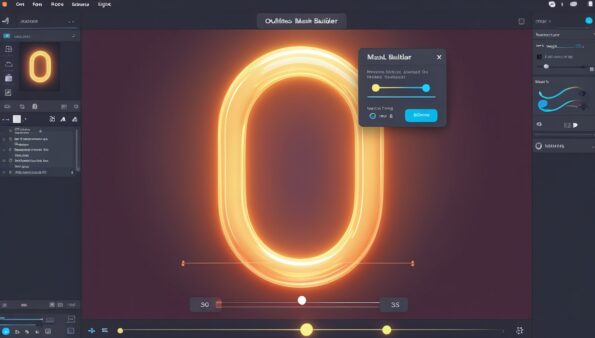
Additionally, they added an Aspect Ratio setting for glows. This allows you to stretch or squash the glow shape, which opens up creative possibilities (for example, an elongated glow horizontally vs. vertically). Setting aspect ratio to anything other than 1.0 will make the glow elliptical; it’s a subtle control, but can give unique looks (note: extreme aspect ratios can increase render times, as the release notes warn). These features give you more creative control over how and where the glow appears, which advanced users will appreciate when crafting a specific look.
🛠️ Other Improvements & Tweaks
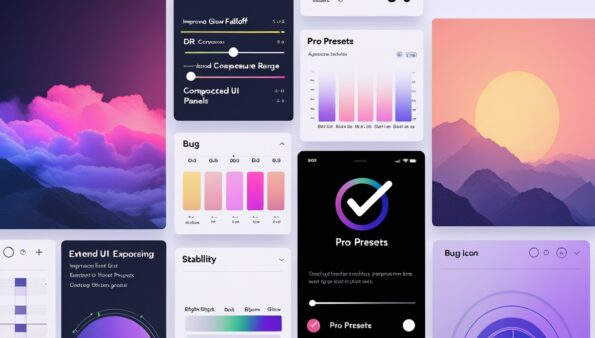
The list of enhancements in Oniric 2.3.0 goes on, but here are a few more notable ones in brief: The underlying glow algorithm has been refined for even smoother, more natural falloff (they’ve essentially “flattened” how input highlights are processed, giving the Threshold more room to work). The Dynamic Range slider is now properly labeled “DR Compression” to clarify its function (it compresses extreme brights). The overall UI has been compacted and cleaned up, especially the mask UI, to make everything more streamlined. They also extended the Exposure adjustment range to ±10 (it used to cap at ±5), so you can push glows much brighter or darker if needed.
On top of that, Factory Presets got an expansion with more pro-designed glow presets, so you have new starting points to experiment with. And behind the scenes, the devs improved algorithms to reduce color banding and improve how luminosity is measured – the result is cleaner, artifact-free glows. They even squashed that pesky license activation bug that some users had (no more getting stuck in activation loops). In short, v2.3.0 isn’t just about big headline features; dozens of little refinements make it a more stable and enjoyable tool overall.
🔍 Oniric v1.2.0 vs v2.3.0 – What’s the Difference?
| Feature / Aspect | Oniric v1.2.0 | Oniric v2.3.0 |
|---|---|---|
| Photoshop Compatibility | CEP Extension; Requires Legacy Extensions (Window > Extensions (Legacy)) | Native UXP Plugin; Shows up in Plugins menu; Runs on Photoshop 2022+ with no hacks |
| Install Complexity | Needs Debug Mode / Registry Edits (esp. on Windows & Apple Silicon) | No tweaks required – plug and play |
| Mac Compatibility | Intel-only; Needs Rosetta on M1/M2 | Fully optimized for Apple Silicon (M1/M2/M3); runs natively |
| Speed & Stability | Slower previews; may lag on large files | Real-time glow updates; optimized render engine; faster even on large canvases |
| Glow Engine | Basic glow with Threshold, Radius, Color | Physically-based glow falloff; more cinematic and realistic glows |
| Glare Options | Limited types and sharpness control | Full Glare Panel with Glare Sharpness slider and more customization |
| Tone Mapping | ❌ Not available | ✅ Advanced filmic tone mapping with HDR support |
| Chromatic Aberration | Basic; no real control | Real-time updates, Intensity slider, Directional Offset for custom color shifts |
| 32-bit Processing | Requires the whole document to be 32-bit | Internal toggle for 32-bit glow processing, even on 8-bit or 16-bit docs |
| Oniric Rays (Volumetric) | ❌ Not available | ✅ Customizable volumetric light rays for magical/sci-fi lighting |
| Mask Builder / Outlines | Simple channel-based masking | One-click outline mask generator + Aspect Ratio for glow shaping |
| UI Design | Fixed-size, basic CEP panel | Sleek, modular UXP UI with tooltips, right-click reset, real-time toggles |
| Presets System | Limited and static | Expanded Pro Presets + Export/Import your own |
| Configuration Panel | ❌ None | ✅ Customize preview behavior, language, and UI options |
| Languages Supported | English only | English, Spanish, Japanese, Czech, and more |
| Pricing (Original) | $79 (approx.) | $5.99 only on PiximPlanet – latest version, fully featured |
How to Download and Install Oniric v2.3.0 (UXP Version)
Ready to add this glow generator to your Photoshop toolkit? Installing Oniric v2.3.0 is straightforward. Just follow these steps and you’ll be up and running in no time. (Note: Since Oniric 2.3.0 is a UXP plugin, the installation process is a bit different from the old extension method. Don’t worry – I’ll walk you through it for both Windows and macOS!)
Step 1: Purchase & Download the Plugin File
Oniric V2.3.0 Glow Generator for Photoshop
⚠️ Important Note:
This plugin may not function as expected on certain environments due to framework-level or host-specific limitations.
Please refer to the Installation Guide (PDF) for full setup instructions.
📝 For issues or refund inquiries, kindly review our Refund Policy.
First, you’ll need to get the Oniric v2.3.0 plugin package. You can download Oniric v2.3.0 from our official product page (PiximPlanet) – simply click the link and complete the quick checkout. Once purchased, you should be able to download a ZIP file containing the plugin. Save this ZIP file to an easy-to-find location on your computer (for example, your Downloads folder or desktop). The file might be named something like Oniric_v2.3.0.zip or CN_Oniric_2.3.0.zip. (If your download came as a .ccx file instead, that’s an Adobe plugin package – you can usually install those by just double-clicking. In our case, we’ll assume it’s a ZIP to install manually.)
Step 2: Extract the ZIP File
Once the download is complete, locate the ZIP file on your system. Right-click and choose “Extract” (Windows) or double-click the zip (macOS) to unpack it. You should end up with a folder named something like Oniric_v2.3.0 or CN_Oniric_2.3.0. Inside this folder, you’ll see the plugin files – importantly, there should be a file called manifest.json and some other files/folders (this confirms it’s a Photoshop plugin package). Keep this extracted folder handy.
Step 3: Install the Plugin into Photoshop’s UXP Plugins Folder
Now we need to place the Oniric plugin folder where Photoshop can recognize it. The location differs slightly for Windows and macOS:
- On Windows: Open File Explorer and navigate to:
C:\Program Files\Common Files\Adobe\UXP\Plugins\External\.
This is the standard directory for third-party Photoshop UXP plugins. If you don’t see an “External” folder under...\Adobe\UXP\Plugins\, you can go ahead and create one. Once you’re in the External folder, copy the entire extracted Oniric 2.3.0 folder from Step 2 and paste it here. For example, after copying, you might have:C:\Program Files\Common Files\Adobe\UXP\Plugins\External\Oniric_v2.3.0\(inside this, the manifest.json file and others should be directly visible). Pro tip: Make sure you don’t accidentally nest the folder twice. For instance, avoid a path like...\External\Oniric_v2.3.0\Oniric_v2.3.0\manifest.json. The manifest file should be one level under the folder in External. If you open the Oniric folder and see another folder with the same name, adjust accordingly to avoid the “double folder” issue. - On macOS: Open Finder and press Shift + Cmd + G to bring up “Go to Folder”. Enter the following path and hit Go:
~/Library/Application Support/Adobe/UXP/Plugins/External/
(The~is important – it points to your user Library. This is the folder for user-installed Photoshop plugins.) If the External folder doesn’t exist in that location, create one. Now copy your extracted Oniric 2.3.0 plugin folder into the External folder. After this, you should have something like:/Users/<YourUsername>/Library/Application Support/Adobe/UXP/Plugins/External/Oniric_v2.3.0/
with the manifest.json inside that Oniric folder. macOS might ask for your password to create/copy into the Library directory – that’s normal (it’s just ensuring you have permission to add plugins).
Why the “External” folder? Adobe Photoshop looks at that Plugins/External directory for any third-party UXP plugins (when Developer Mode is enabled – we’ll cover that next). By placing the Oniric folder there, we’re making Photoshop load it as if it were an installed plugin.
Step 4: Enable Developer Mode in Photoshop (if needed)
Modern Photoshop (2022 and above) sometimes requires enabling plugins from unknown sources. To ensure Photoshop will load our manually installed plugin, do the following:
- Launch Photoshop. In the top menu, go to Edit > Preferences > Plugins.
- In the Plugins preferences, find the option that says “Enable Developer Mode” and check it. Photoshop might show a warning about this being for development purposes – that’s okay. Developer Mode simply allows Photoshop to load unsigned or manually added plugins (like our Oniric plugin) that didn’t come from the official Adobe Exchange.
- Click OK and restart Photoshop for this change to take effect.
Enabling Developer Mode is usually necessary when adding UXP plugins outside of the Creative Cloud marketplace. It tells Photoshop, “I trust these third-party plugins, please load them.”
Step 5: Launch Photoshop and Load Oniric
With the files in place and Developer Mode on, it’s the moment of truth! Open (or restart) Adobe Photoshop if it was already open. Once Photoshop is up and running, look at the top menu for Plugins. Click the Plugins menu, then Plugins Panel (in newer versions, it might just list the plugin name directly under Plugins). You should see Oniric listed there (sometimes under a “Composite Nation” category, or as a standalone entry). Click Oniric to launch the plugin panel inside Photoshop.
If everything was done correctly, the Oniric panel will pop up, usually as a sidebar or window in Photoshop. Hooray – you’ve installed Oniric 2.3.0! You might see a welcome screen or the main interface with tabs for Glow, Glare, Presets, etc. Now you can open an image and start experimenting with those amazing glow effects. Try selecting a layer with some bright spots, adjust a few sliders (Threshold, Intensity, Colorize maybe), and hit the “Generate” button – watch your image light up with a beautiful glow. 🌟
Step 6: Activation (PiximPlanet Release Specific)
Since this is a PiximPlanet release of Oniric, we’ve made activation super easy. Unlike the official version that might ask for a license key or login, our release comes pre-activated for you. This means you do NOT need to enter any serial number or sign into any account to use Oniric v2.3.0 – it should be ready to go from the moment you install. On first launch, if you’re prompted with any “license” dialog, we will have provided instructions or a license file in the download package (check for an Installation Guide PDF or a text file included with the plugin – it will have any necessary activation info). Typically, for our releases, you either get a license code to input or the plugin is already patched to skip activation. Just follow whatever note is in the included guide. In most cases, you’ll find that it opens straight to the plugin interface without any nags.
If you do see a license prompt despite everything, don’t worry. As of v2.3.1, the developer fixed a bug with license loopscompositenation.com, so make sure you’re using the latest file we provided. And of course, you can always reach out to us if you encounter any activation issues – we’re here to help you get glowing.
Troubleshooting: Getting Oniric 2.3.0 to Work Smoothly
Usually, installing Oniric is a breeze. But if the plugin isn’t showing up or something seems off, here are some common issues and how to fix them:
- Oniric not appearing in Photoshop’s Plugins menu: If you don’t see Oniric under Plugins, double-check that you put the plugin folder in the correct location. Remember, it should be under UXP/Plugins/External. Also verify that you enabled Developer Mode in Photoshop preferences (without it, Photoshop might ignore external plugins). After enabling, restart Photoshop. If you still have trouble, it could be a version issue – ensure your Photoshop is updated to a version that supports UXP plugins (ideally PS 2022 or newer, version 23.3+). Older Photoshop versions won’t load UXP plugins at all.
- Accidental double-folder “nesting”: This is a very common issue. If Oniric isn’t loading, go back to the
Externalfolder and open your Oniric folder. Do you see themanifest.jsonfile immediately inside? If instead you see another folder with the same name, that means you have one folder too many in the path. Fix it by moving the inner folder out. For example, you want...\External\Oniric_v2.3.0\manifest.json(plus other files). If you have...\External\Oniric_v2.3.0\Oniric_v2.3.0\manifest.json, drag that inner folder out into External and delete the empty duplicate layer. Then restart Photoshop. - The plugin shows up but won’t open or gives an error. If Oniric is listed but clicking it does nothing, or you get an error message when launching, it could be a permission issue or an OS security block. On Windows, ensure you have permission to write to the Common Files directory (running Photoshop as admin is not required usually; just installing with admin rights is enough). On macOS, if you copied to the global
/Libraryinstead of your user directory~/LibraryThe plugin might be quarantined by macOS Gatekeeper. Try copying it to the user Library path as mentioned (or vice versa, if one location doesn’t work, the other might). Additionally, on macOS, check System Preferences > Security & Privacy after trying to launch – if it says something like “Oniric… was blocked from use because it is not from an identified developer,” click “Allow Anyway” and then try launching again. This can happen with some third-party plugins. - Mac users – still not seeing the plugin: If you’re on an older Photoshop on Mac and nothing from the Plugins menu is visible, you might be running a version that doesn’t support UXP (e.g., Photoshop 2020 or 2021 might not fully support it). In that case, you either upgrade Photoshop or use the older Oniric v1.2.0 (which uses Extensions (Legacy)). But assuming you have Photoshop CC 2022+ and Oniric 2.3.0, you should see it. One more thing: On Apple Silicon Macs, do not run Photoshop under Rosetta for Oniric 2.x – it’s not needed and could actually hide the plugin (Rosetta is only needed for legacy extensions like v1.2.0). Run Photoshop natively, and the UXP plugin will show.
- “Plugin cannot be loaded” or error messages: If Photoshop throws an error like “cannot be loaded because it’s not properly signed” or similar, double-check that Developer Mode is enabled as described in Step 4 above. Adobe really locks down external plugins by default for security, so that developer mode switch is usually the key. Once that’s on, restart and it should load fine. Also, ensure you extracted all files correctly – an incomplete plugin (missing files) could fail to load, so re-extract from the ZIP if needed.
- Oniric panel opens but features seem glitchy or greyed out: Make sure you have an image open and a normal pixel layer selected – Oniric won’t generate a glow on an empty canvas or some adjustment layer. Also, check if your image is in a mode supported by Oniric (e.g. 8-bit, 16-bit, or 32-bit RGB). If you’re in CMYK or some exotic color mode, switch to RGB. If things are glitchy, try resetting the plugin (there might be a reset button or just restart Photoshop). This version is quite stable in our testing, but as always, saving your work before applying effects is a good habit.
If none of these tips solve your problem, don’t hesitate to reach out via our support or leave a comment. We’ve got a community of users, and we’re here to help you get the most out of Oniric. Usually, any installation issue boils down to a small oversight that’s easy to fix once identified.
Get Oniric v2.3.0 Glow Generator (for Just $5.99)
By now, you’ve seen how Oniric v2.3.0 can supercharge your Photoshop lighting effects – from subtle blooming glows to full-on cinematic rays. If you’re excited to elevate your artwork with these tools, the next step is simple: grab your copy of Oniric 2.3.0 and start creating!
✨ Download Oniric v2.3.0 Glow Generator for Photoshop ✨ (via PiximPlanet – secure checkout)
For only $5.99, you’ll own this powerful plugin outright – no subscriptions, no recurring fees. That’s a fraction of the original price, making professional-grade effects accessible whether you’re a student, hobbyist, or pro on a budget. Once you have Oniric installed, the creative possibilities are endless. Think about it: dreamy wedding photos with soft lens glows, sci-fi composites with neon holograms, nightlife shots with enhanced neon signs, or even graphic design posters that pop with luminous text effects. Oniric 2.3.0 gives you the lighting “magic wand” to do it all.
Don’t miss out on transforming your images with a touch of glow mastery. Click the download link above, and let Oniric brighten up your Photoshop toolbox. Trust me – once you see what your photos look like bathed in that beautiful oniric light, you’ll wonder how you managed without it!
(Remember: You’re not just buying a plugin; you’re investing in new creative possibilities. And with our guide and support, you’ll have it installed and shining in no time.)
FAQ: Frequently Asked Questions
Q: Which versions of Photoshop are compatible with Oniric v2.3.0?
A: Oniric v2.3.0 is designed for Adobe Photoshop CC 2018 and above, but in practice, you’ll want to use it on Photoshop 2022 (version 23.3) or later for the smoothest experiencecreatorstoolbox.co. Since it’s a UXP plugin, it shows up under the Plugins menu available in Photoshop 2021+ (Photoshop CC 2021 introduced UXP, but we recommend 2022+ because that’s when Oniric’s UXP version became fully supported). In short, if you have Photoshop CC 2022, CC 2023, CC 2024, etc., you’re golden. Oniric 2.3.0 will not work in very old Photoshop versions that lack the Plugins/UXP infrastructure (for example, CC 2015 or CS6 are too old). If you’re still on Photoshop 2020 or 2021, you might consider updating, or alternatively, use Oniric v1.2,,0 which is for legacy extensions. But to harness v2.3.0, update Photoshop to a newer release. The good news is, Oniric 2.3.0 does not require “Extensions (Legacy)” – it runs natively in modern Photoshop, which means no special hacks needed once you have the right version.
Q: Does Oniric v2.3.0 work on macOS, and is it Apple Silicon (M1/M2) compatible?
A: Yes, indeed! Oniric v2.3.0 fully supports macOS. In fact, one of the big advantages of the v2+ series is that it’s optimized for Apple Silicon Macs. It runs natively on M1, M2, and the latest M3 chips without needing Rosetta translation. This means if you’re on a newer MacBook Pro/Air or Mac Studio with an Apple chip, Oniric will take full advantage of that performance, and you won’t have the slowdown that Rosetta could cause. Many internal tests have shown Oniric 2.x is extremely fast on Apple Silicon, especially with the real-time previews (the M chips handle the computations like a champ). For Intel-based Mac users, don’t worry – it works on those machines too, as long as you have a supported Photoshop version. Essentially, whether you’re on macOS Mojave, Catalina, Big Sur, Monterey, or newer, Oniric will run. Just note: if you’re on an older Mac OS and Photoshop version that doesn’t show the Plugins menu, you might need to update or stick to legacy Oniric. But any reasonably modern Mac setup will run Oniric 2.3.0 just fine. No special steps are needed on Mac beyond what we covered (placing the plugin in the right folder and enabling developer mode).
Q: What is this “32-bit glow” feature, and do I need to use it?
A: The 32-bit processing option in Oniric 2.3.0 is a new feature that lets the plugin internally use a 32-bit High Dynamic Range for generating glows. In simpler terms, it means Oniric can work with a much wider range of brightness values and colors when creating the glow effect. This results in smoother gradients and more intense glows without washing out details. Do you absolutely need to use it every time? Not necessarily – Oniric will produce great results in standard 8-bit or 16-bit mode too. But if you’re working on images with very bright highlights (like HDR photos, 3D renders, or graphics with bright speculars) and you notice the glow isn’t as pronounced or smooth as you’d like, flipping on the 32-bit switch can help a lot. It’s ideal for scenarios where you have super-bright sources and want that really rich bloom. Keep in mind: enabling 32-bit in Oniric might use a bit more memory/processing (since it’s dealing with more data), so if you’re on a slower PC and the performance hits, use it only when needed. For most normal photos, you might not see a huge difference, but for high dynamic range content, it’s a fantastic option. It essentially future-proofs your glow – even if your image has “values beyond white” (HDR), Oniric can glow those areas nicely. If you’re unsure, do a quick experiment: generate a glow with it off, then with it on, and compare. You’ll likely see that the one with 32-bit enabled has a finer gradation and richer light.
Q: Do I need an internet connection or Adobe account to use Oniric v2.3.0?
A: You’ll need internet only to download the plugin from our site and to initially activate it (and even the activation is just a one-time step we’ve simplified). After that, no internet connection is required to use Oniric day-to-day. Oniric v2.3.0 doesn’t constantly phone home or require Adobe Exchange verification once it’s installed. There’s no monthly online check-in or anything like that for our PiximPlanet release. This is great news for folks working on offline computers or in environments without internet access – you can use the Glow plugin freely once it’s set up. Also, you do not need an Adobe Creative Cloud subscription beyond Photoshop itself; Oniric is a third-party plugin, so as long as Photoshop is working, Oniric will run. In summary: download it, install/activate following our guide, and you’re free to use it completely offline. No cloud dependencies, no ongoing logins. Just pure creative glow power at your fingertips!
Q: What kinds of photos or projects is Oniric best for?
A: Oniric shines (pun intended!) in any image where you want to emphasize light or create a mood with glows. Here are a few examples of where it excels:
- Night scenes and cityscapes: Have a photo of a city at night with street lamps or neon signs? Oniric can make those lights bloom beautifully, giving a vibrant, atmospheric feel. Think of turning tiny pinpoints of light into dreamy orbs, or adding glow to neon letters so they look alive.
- Portraits with lights: For creative portraits, if your subject has fairy lights, candles, or any bright elements, Oniric can enhance those to give a magical, soft glow. Even for studio shots, adding a gentle bloom to catchlights in the eyes or a rim light can add a cinematic quality.
- Sci-fi and fantasy art: Oniric is incredibly popular among composite artists. If you’re creating a sci-fi scene with holograms, lasers, or glowing gadgets, or a fantasy piece with magical spells or fireflies, the plugin lets you generate believable light effects in seconds. The new Rays feature is perfect for things like light beams in a spaceship or enchanted light shafts in a fantasy forest.
- Landscape and nature: Sunsets and sunrises can benefit from a slight bloom to make them feel more radiant. If you have the sun peeking through trees or over a mountain, adding a subtle glow or even rays can amplify the drama. Oniric can also enhance starbursts or glints on water for those golden hour shots.
- Product photography & graphics: If you’re designing a poster or advertisement and want, say, a glowing neon ring behind a product, or light streaks to draw attention, Oniric can do that. It’s not just for photos – digital artists can use it on shapes and text too. For example, make a logo emit a cool glow or give text a sci-fi neon effect.
- Astrophotography: Got shots of the Milky Way or stars? A careful touch of Oniric can make the stars twinkle and glow a bit more, giving a dreamy astrophotography look (though moderation is key here).
In a nutshell, any project where lighting is a key element can benefit from Oniric. Even if the effect is subtle, a little bloom can add warmth and realism (real cameras have bloom, after all, which is why CG artists love Oniric for renders – it adds that photographic touch). That said, Oniric is a creative tool – there’s no limit to where you can use it. I’ve seen users apply it to typography to create cool glowing text effects, or to abstract art for colorful light patterns. Feel free to experiment! The plugin gives you a lot of control, so it can be gentle and natural or bold and surreal, depending on your vision.
I hope this guide has illuminated (😉) what Oniric v2.3.0 can do for you. It’s one of those tools that once you start using, you’ll find yourself adding glows to everything – and wondering how you lived without it. Whether you’re a photographer looking to enhance realism or a digital artist crafting otherworldly scenes, Oniric will be your go-to glow generator.
Happy glowing, and enjoy your new creative superpower with Oniric v2.3.0! <!– **SEO Meta Description:** Oniric v2.3.0 Glow Generator (UXP) for Photoshop is a major upgrade bringing tone mapping, 32-bit HDR glows, chromatic aberration, volumetric light rays, and more. Learn about all the new features, how to install & activate this plugin (Windows/Mac), and why it’s a must-have for dreamy lighting effects – now available at a fraction of the cost. –>